Use Advanced Search
The Advanced Search feature of Eclipse SE Desktop allows you to easily construct complex search expressions or specialized searches and display results in a Search Results tab. In the Advanced Search dialog box, you can combine multiple search types. For example, you could combine a full-text search for the term “retroactive” with a search for the “Privileged” document tag. The search results will list all records that meet both criteria.
See the following sections for an example of the Advanced Search dialog box and details about its components:
To review the types of search available in the Advanced Search dialog box, see Types of Search.
Before You Begin
Before you use Advanced Search, it is recommended that you read the Search Overview.
To get started with the Advanced Search dialog box, click Advanced on the main search bar.

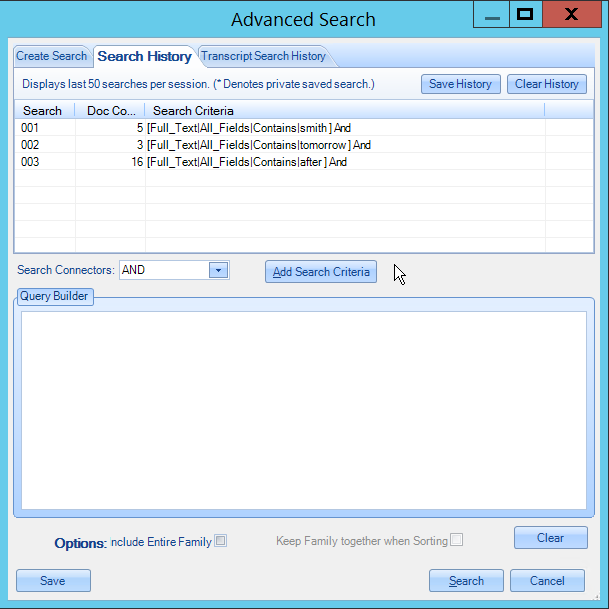
The Advanced Search dialog box displays. Use this dialog box to define the parameters of your search. Alternatively, you can review your search history and transcript search history by clicking on the tabs at the top of the dialog box.

See Advanced Search Dialog Box for more information on the various components of the dialog box. For a detailed breakdown of the options available to you when running an advanced search, see Advanced Search Options.
Advanced Search Statement Connection Example
In the following example, search results will include records in which:
-
any fields contain the words “total” and “revenue” OR
-
any field contains the word “profit” AND
-
the Author field contains the names “gene” and “summer"

See Basic Search Operators for more information on using search connectors (AND, OR, or NOT) to further specify your search.
Advanced Search Procedure
To use the Advanced Search dialog box to construct a search:
-
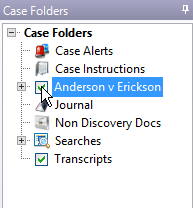
To search case documents, ensure that the case option is selected in the Case Folders tab.

-
On the main search bar, click Advanced.
-
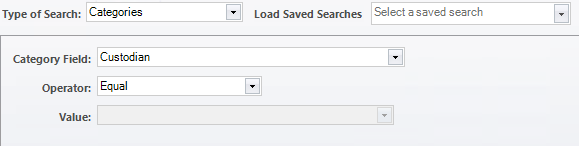
In the Advanced Search dialog box, select the needed search from the Type of Search list. See Advanced Search Dialog Box for more information on the various components of the dialog box.
-
Complete the options area specific to the type of search selected. For details on the options available for each type of search, see Advanced Search Options.
-
If you do not need to include additional search criteria, ensure that the Search Connector field is blank and skip to step 8. Otherwise, continue with the next step.
-
Search Connectors: Select the connector (AND, OR, or NOT) that will connect the currently defined search statement with the next one. For the final search statement to be added, select the blank line. See Basic Search Operators for more information on using search connectors to narrow down your search.
- If you have a file containing a list of search terms, you can import it by clicking the Import Search Terms button. Each search term should be on its own line. Before import, ensure that the correct search connector (AND, OR, or NOT) has been selected in the Advanced Search dialog box. This search connector will appear between each item in the list.
-
Press the Enter key or click Add Search Criteria.
-
Repeat the previous steps to add all search statements to be included in the search expression.
-
If desired, select the Include Entire Family option. This option includes documents related to those matching your search criteria in the search results.
-
When finished, review the Query Builder field. If needed, make changes as explained in Change an Advanced Search.
-
Save or execute the search:
-
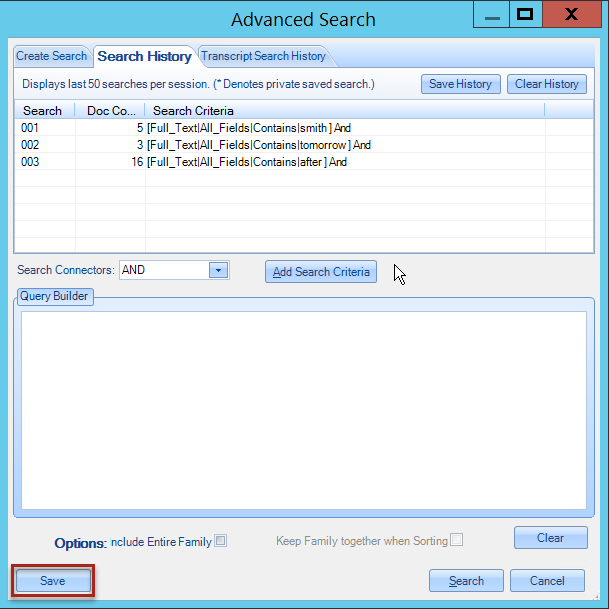
To save the search, click Save and complete the Save Search dialog box.
-
To execute the search, click Search. Depending on case size and search complexity, a progress indicator may display. When the search is complete, results appear in a new Search Results tab in the Case Folders pane. Expand the Search Results tab by selecting the plus icon
 .
. -
If a search takes more time than you expected and needs to be stopped, click the Cancel button on the progress bar. Eclipse SE will stop the search.
-
-
View results in the Search Results, Image, Quick View, or Extracted Text tabs, the Transcript Viewer, and/or the Record View. For details, see Where Search Results Appear.
View Transcript Search Results
To pull up transcript search results, click on the Transcript Search tab in the Documents pane.
![]()
All transcripts that contain the search expression will appear below it. Expand the transcripts, and the folders inside them, by clicking the plus icon beside each transcript or folder you would like to open.
![]()
Expand the folders to view the search words that appear in the transcript, as well as their page:line references within the document. Click on the various page:line references to jump to the exact place in the transcript where each instance of the term appears.
Advanced Search Dialog Box
Advanced Search dialog box components are described in the following table. For more information on the options available to you when running an advanced search, see Advanced Search Options.
|
Component |
Description |
|
Tabs |
|
|
Create Search |
Use the options and fields on this tab to construct and execute one or more search statements.
|
|
Search History |
View and use searches executed during your current working session.
|
|
Transcript Search History |
View and use transcript searches executed during your current working session.
|
|
Create Search Tab Components |
|
|
Type of search |
Select the type of search to be performed. (See Types of Search.) |
|
Load Saved Searches |
If you have previously saved one or more searches, click this button to select a needed search. (See Work with Saved Searches.) |
|
Options area |
Depending on the type of search selected, various options are available in this area. See Advanced Search Options for details on the options for different types of searches. |
|
Search Connectors |
For searches with multiple search statements, select the needed connector (AND, OR, or NOT) to be used between each statement. Before adding your last search statement, select the “blank” connector. See Basic Search Operators for more information on search connectors. |
|
Add Search Criteria |
Click to add the search statement defined in the top portion of the dialog box to the Query Builder field. |
|
Import Search Terms |
Click to import a list of search terms. Each search term should be on its own line. Before import, ensure that the correct search connector (AND, OR, or NOT) has been selected in the Advanced Search dialog box. This search connector will appear between each item in the list. |
|
Query Builder field |
Search statements created in the top portion of the dialog box appear in this field using the Advanced Search syntax. You can also manually type search statements, using dialog box syntax. For more information on proper syntax, see Full-text Search Options. |
|
Include Entire Family |
Select this option to include documents related to those documents matching your search criteria in the search results. |
|
Keep Family together when Sorting |
If Include Entire Family is selected, select this option to keep related documents together with sorted documents (as sorted before you started the search). |
|
Search History Tab Components |
|
|
Save History |
Click Save to save the search history for the current Eclipse SE session to a location on your computer or network.
|
|
Clear History |
Click Clear to clear the search history for the current Eclipse SE session and close any open search tabs.
|
|
Buttons |
|
|
Clear |
Click Clear to remove entries in the Query Builder field. |
|
Save |
Click to save a search for future use. (See Work with Saved Searches.) |
|
Search |
Click to execute the search you have defined. Results appear in a separate Search Results tab in the documents pane, as well as in the Transcript Viewer. See Where Search Results Appear for more information on where search results populate. |
|
Cancel |
Click to cancel the search and close the Advanced Search dialog box. |

Related Topics:
Last Revision: 6/2/2023
Version: 2019.0.0